
Turn on certificates for a course, and every learner who finishes it receives a polished PDF Certificate of Completion. Each certificate has a unique ID and a QR code that links to a public verification page, so an employer can confirm it’s genuine in seconds.
Turn on certificates for a course
In the course builder, open Course settings and tick Issue a certificate on completion, then publish the course.
Certificates are issued automatically the moment a learner completes the course. Learners who finished before you turned certificates on receive theirs the next time they visit their dashboard or My certificates. Each learner gets one certificate per course, and an email when it’s issued.
The learner’s name, the course title, the hours, the date, and your company name are captured when the certificate is issued. Later changes to the course don’t alter certificates already awarded.
Design your certificate
Open Admin > Certificates > Design. There is one design for every course. Change it and watch the live preview update. Nothing changes for learners until you click Save design.
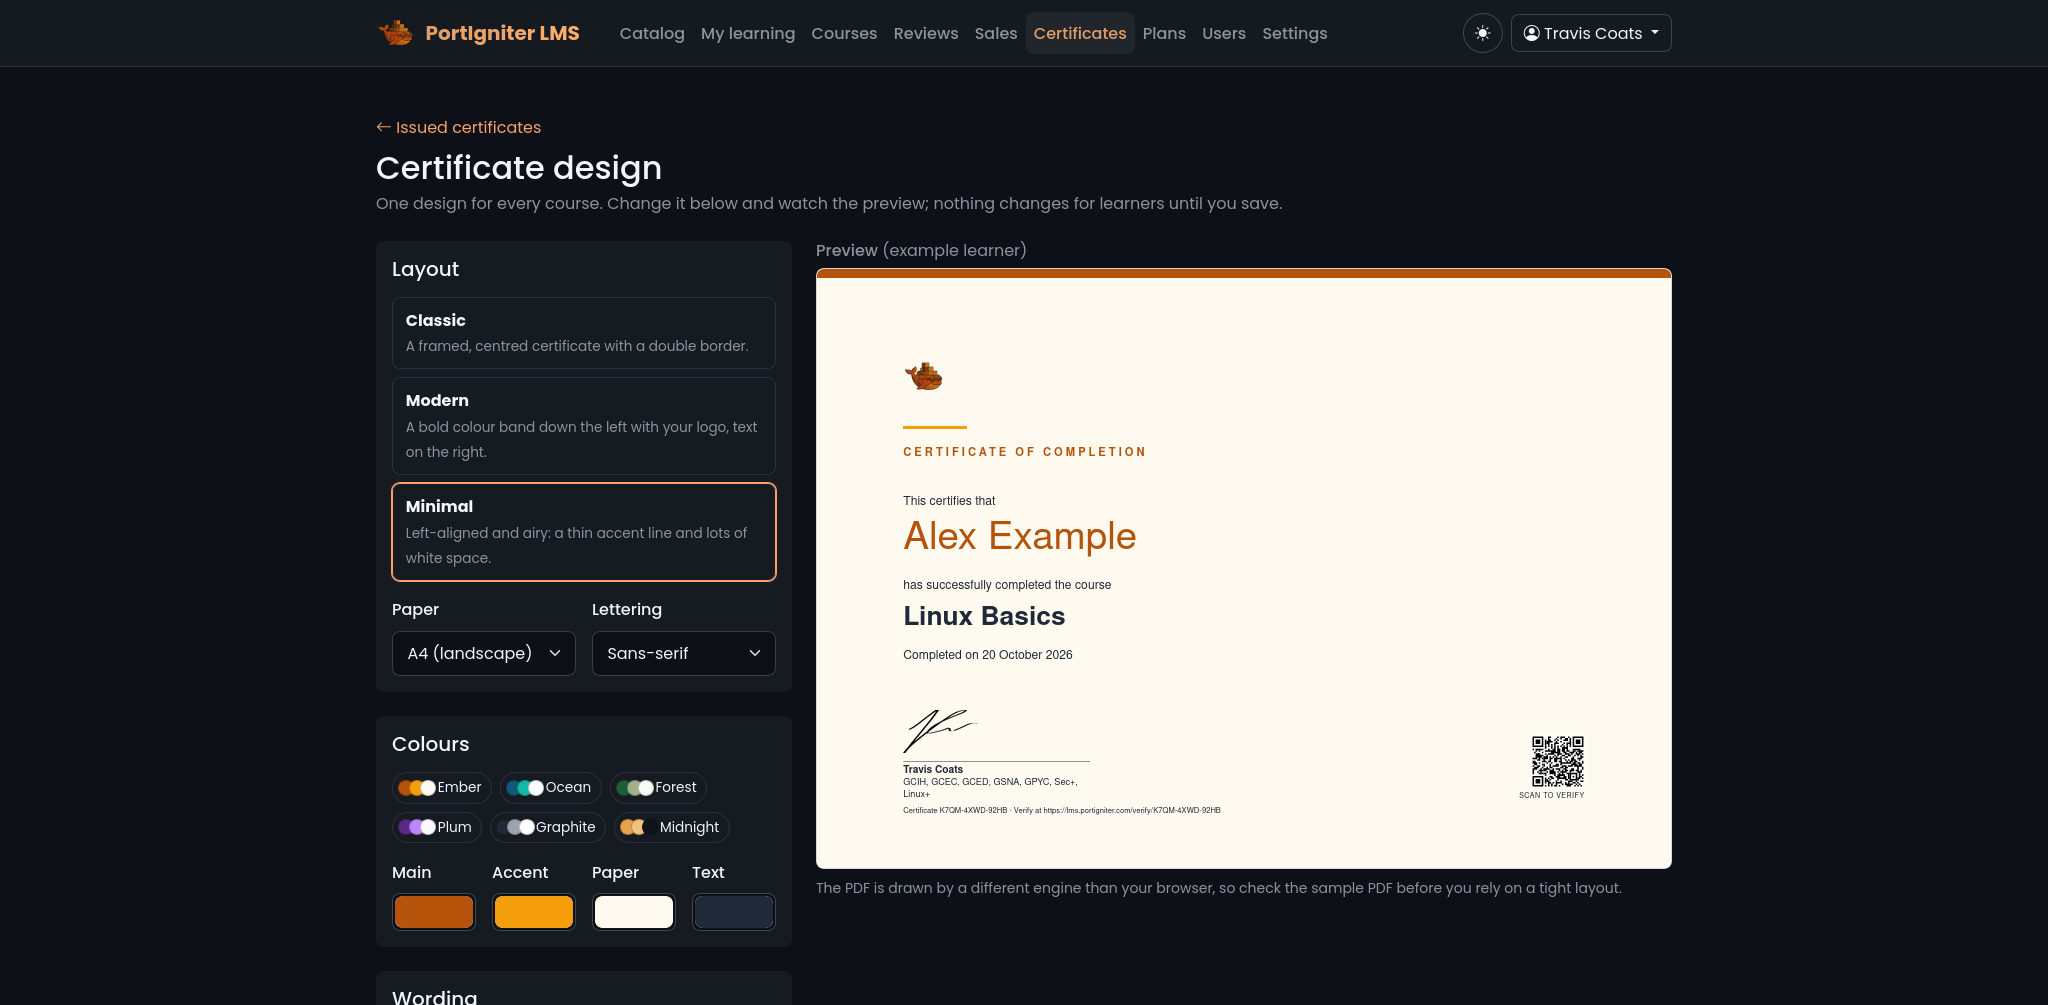
| Section | What you can change |
|---|---|
| Layout | Three templates: classic, modern, and minimal. |
| Paper | A4 or Letter, in landscape. |
| Colours | Your own colours, or a preset. |
| Lettering | The font. |
| Wording | Every line of text, with placeholders (below). |
| Pictures | A logo, a background, and a signature, as PNG, JPEG, or WebP images. |
| QR code | Print a QR code that checks the certificate. Scanning it opens the verification page for that certificate. |
Click Open a sample PDF to check the real output. The PDF is drawn by a different engine than your browser, so always check the sample before relying on a tight layout.
Wording placeholders
Use these in the wording, and they are filled in for each certificate:
| Placeholder | Becomes |
|---|---|
{student_name} |
The learner’s name. |
{course_title} |
The course title. |
{date} |
The completion date. |
{hours} |
The course length in hours. |
{certificate_id} |
The certificate’s unique ID. |
{company_name} |
Your company name from Admin > Settings. |
{site_name} |
Your site name. |
{course_url} |
The course page address. |
{verify_url} |
The certificate’s verification page address. |
What learners see
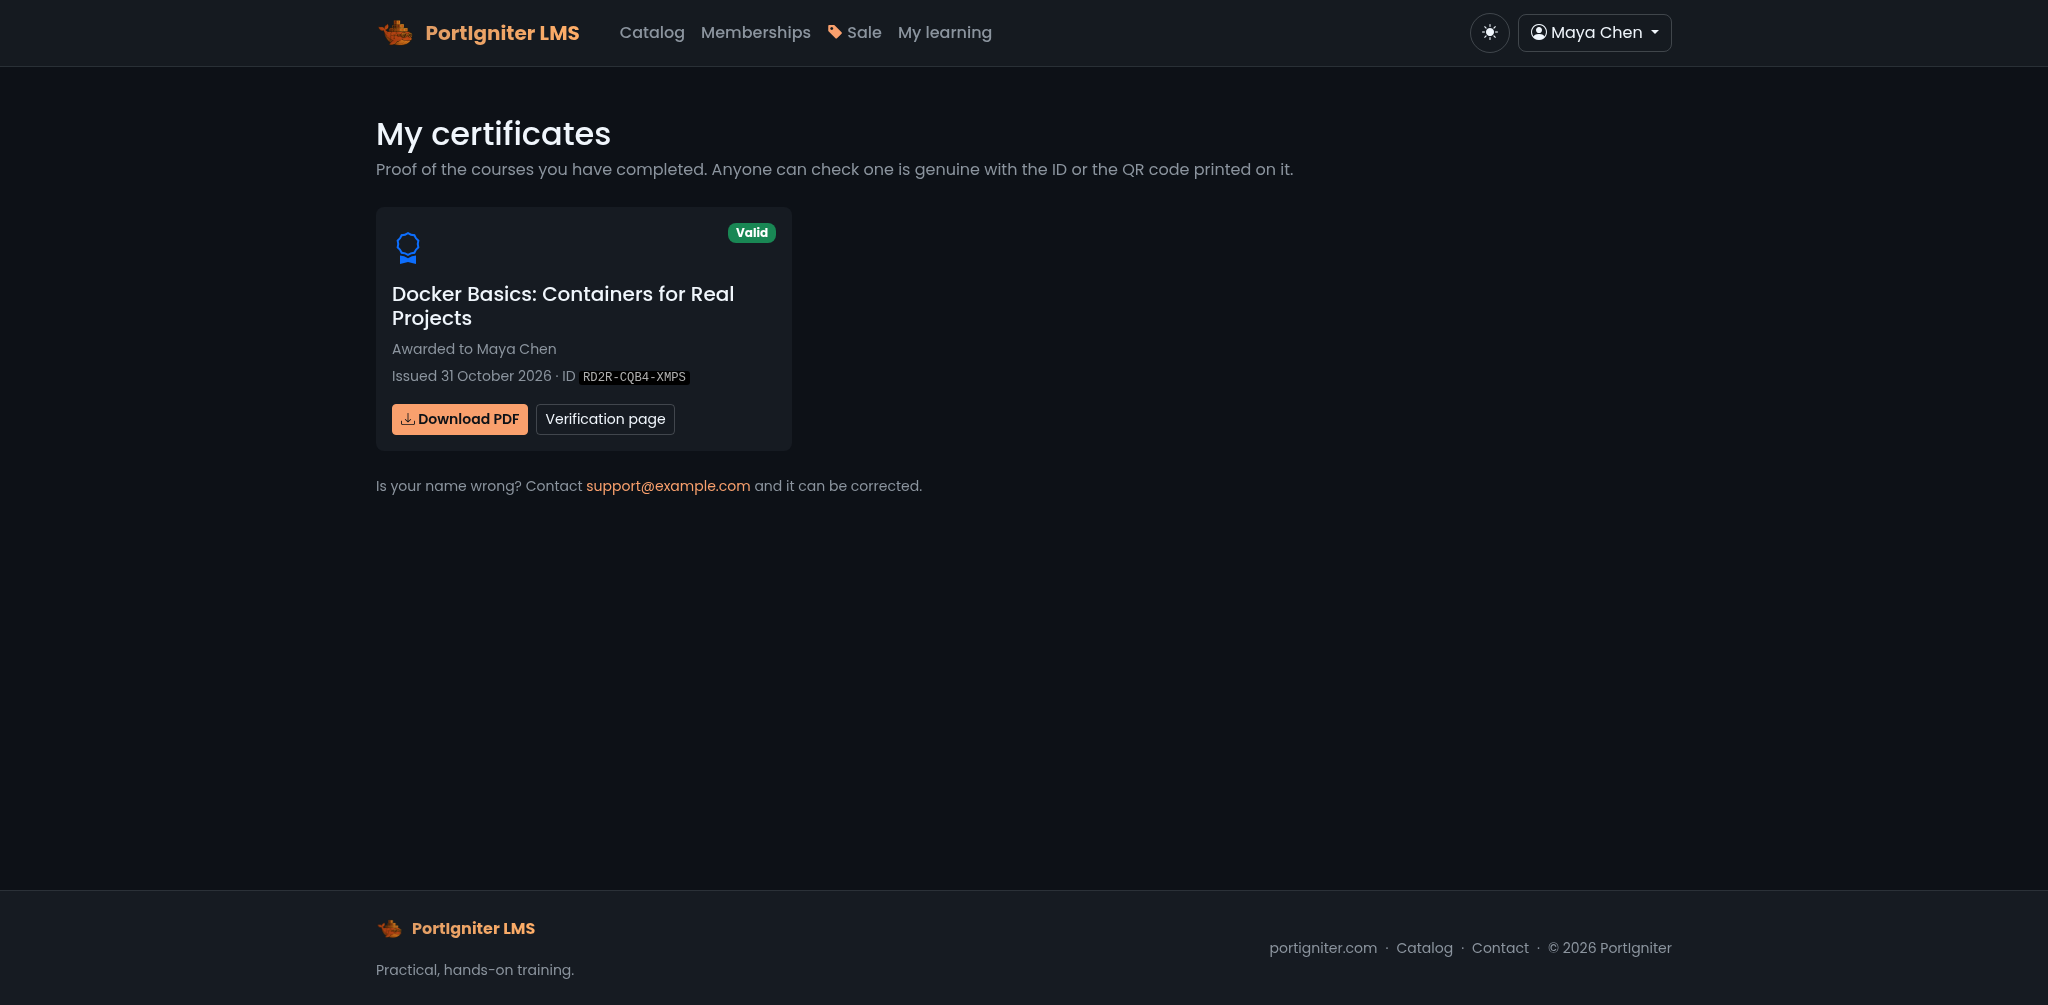
Learners find their certificates under My certificates in the account menu, on their dashboard, and on the course page. Each one can be downloaded as a PDF at any time.
Verifying a certificate
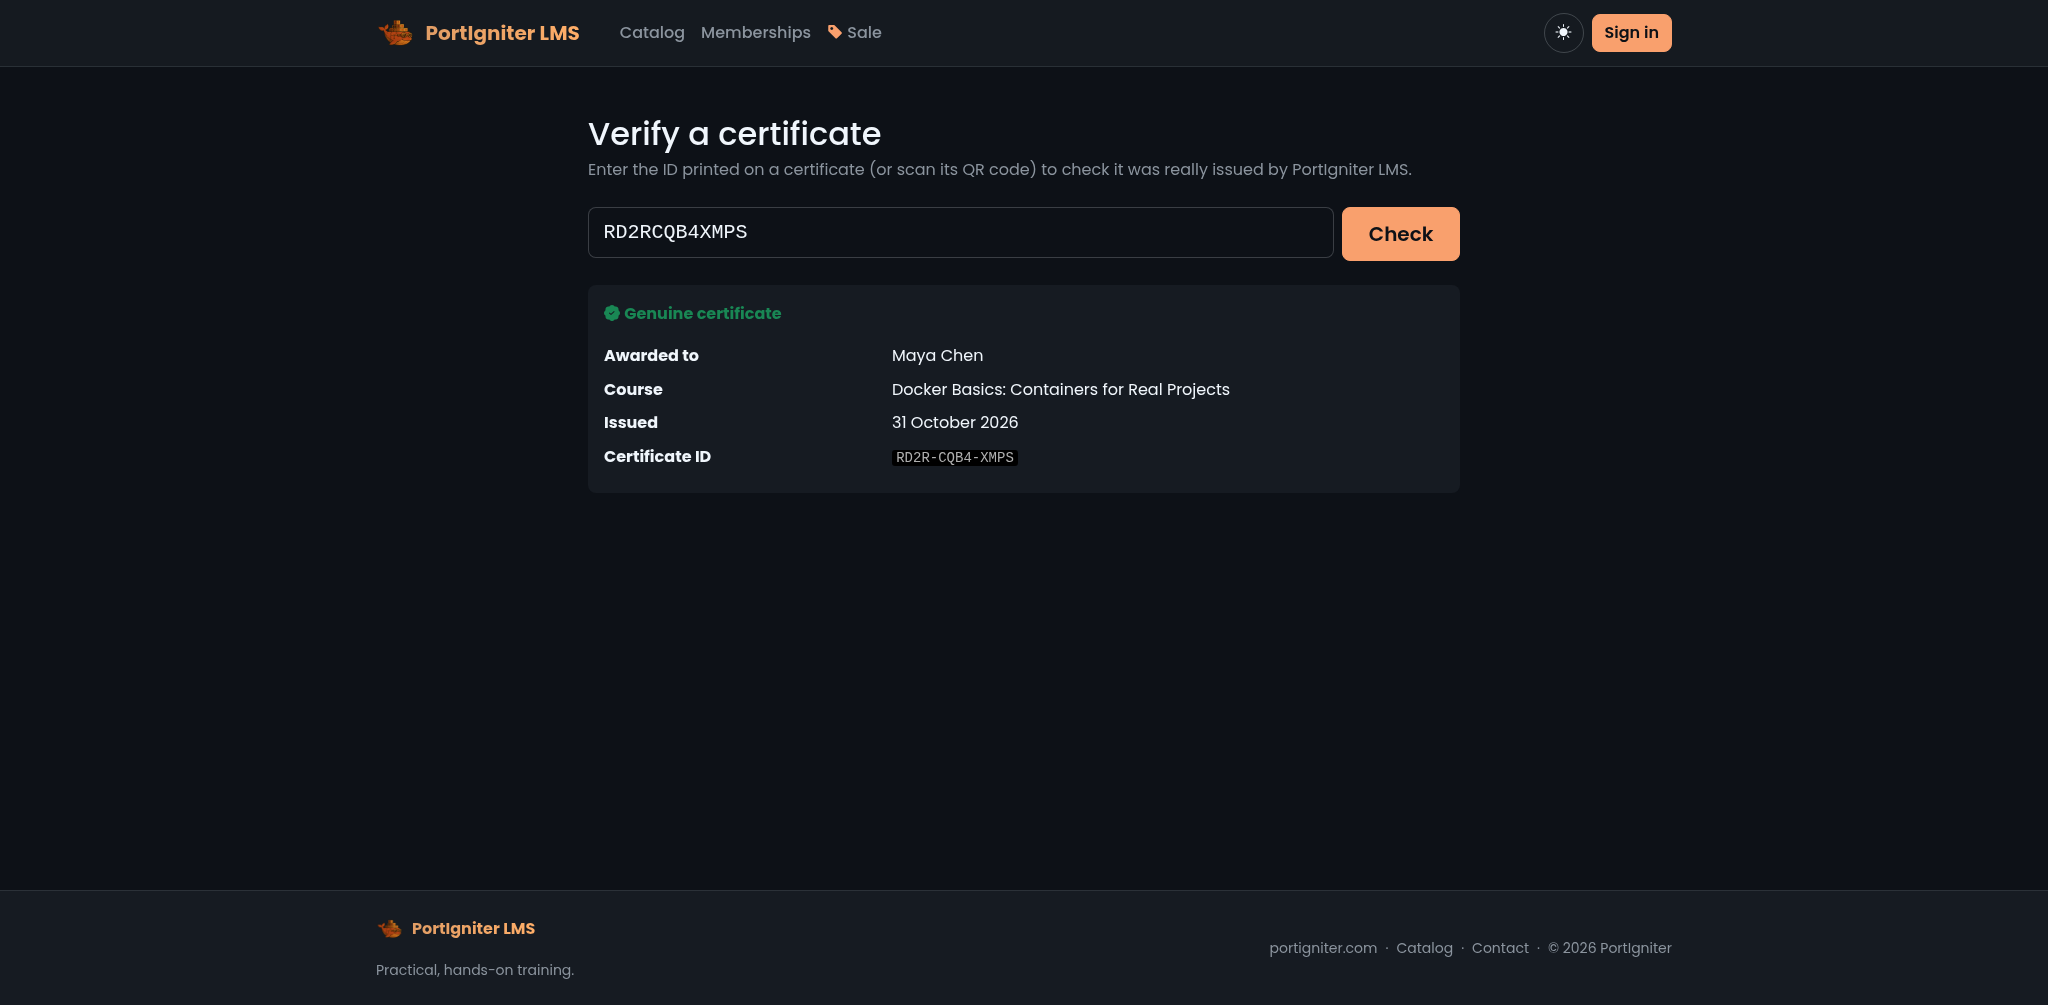
Every certificate ID looks like K7QM-4XWD-92HB. Anyone can check one at /verify by entering the ID, or by scanning the QR code. No account is needed. The page shows whether the certificate is genuine, who it was awarded to, the course, and the date issued. It never shows an email address.
IDs are random and hard to guess, and the page ignores letter case and dashes, so an ID typed by hand still works.
Managing issued certificates
Admin > Certificates lists every certificate issued. Search and filter the list, and for any certificate:
- Revoke it. The verification page then says it is no longer valid, and the learner can no longer download it.
- Restore a revoked certificate.
- Correct the printed name, for example to fix a typo. The ID and QR code stay valid.
Learners who spot a mistake in their name are directed to your support email address.