
PortIgniter LMS sells through your own Stripe account. There is no marketplace taking a cut: payments go straight to you. Buyers pay on Stripe’s hosted Checkout page, so card details never touch your server.
If every course is free, you can skip this page. Without Stripe keys, paid courses show “Purchasing isn’t available right now” instead of a Buy button.
Set up Stripe
1. Add your keys
In the Stripe Dashboard, open Developers > API keys and copy your publishable and secret keys into .env. Start in test mode, where no real money moves:
stripe.testMode          = true
stripe.publicTestKey     = pk_test_xxx
stripe.privateTestKey    = sk_test_xxx
stripe.testWebhookSecret = whsec_xxx

stripe.publicLiveKey     = pk_live_xxx
stripe.privateLiveKey    = sk_live_xxx
stripe.liveWebhookSecret = whsec_xxx

stripe.currency          = usd
You can keep both key pairs filled in. stripe.testMode picks which pair is used.
2. Create the webhook
Stripe tells PortIgniter LMS about payments, refunds, and subscription changes through a webhook. In the Stripe Dashboard, open Developers > Webhooks, add an endpoint at:
https://YOUR-SITE/webhook/stripe
Subscribe it to these events:
| Event | Why it’s needed |
|---|---|
checkout.session.completed |
Grants access after a purchase or new membership. |
checkout.session.async_payment_succeeded |
Grants access for payment methods that confirm later. |
charge.refunded |
Pauses access after a full refund. |
charge.dispute.created |
Pauses access when a payment is disputed. |
customer.subscription.updated |
Keeps memberships in step with Stripe. |
customer.subscription.deleted |
Ends a canceled membership. |
invoice.paid |
Records membership renewals. |
Copy the endpoint’s signing secret (whsec_...) into stripe.testWebhookSecret. Test mode and live mode each have their own webhook and their own secret, so repeat this for live mode when you’re ready.
Apply the changes with docker compose up -d.
3. Test a purchase
Set a price on a course, make sure its Who can enroll setting is Open, and publish it. Open the course page in a private browser window, click Buy, and pay with Stripe’s test card 4242 4242 4242 4242, using any future expiry date and any CVC.
To test on a computer Stripe can’t reach, forward webhooks with the Stripe CLI:
stripe listen --forward-to localhost:7080/webhook/stripe
Use the whsec_... secret it prints as your stripe.testWebhookSecret.
4. Go live
- Add a live-mode webhook with the same events, and copy its secret into
stripe.liveWebhookSecret. - Fill in
stripe.publicLiveKeyandstripe.privateLiveKey. - Set
stripe.testMode = falseand rundocker compose up -d.
Selling a course
Give a course a Price in its course settings, set Who can enroll to Open, and publish it. The price appears on the catalog card and the course page, along with a Buy button. Optionally set Access lasts (days) to sell time-limited access instead of lifetime access.
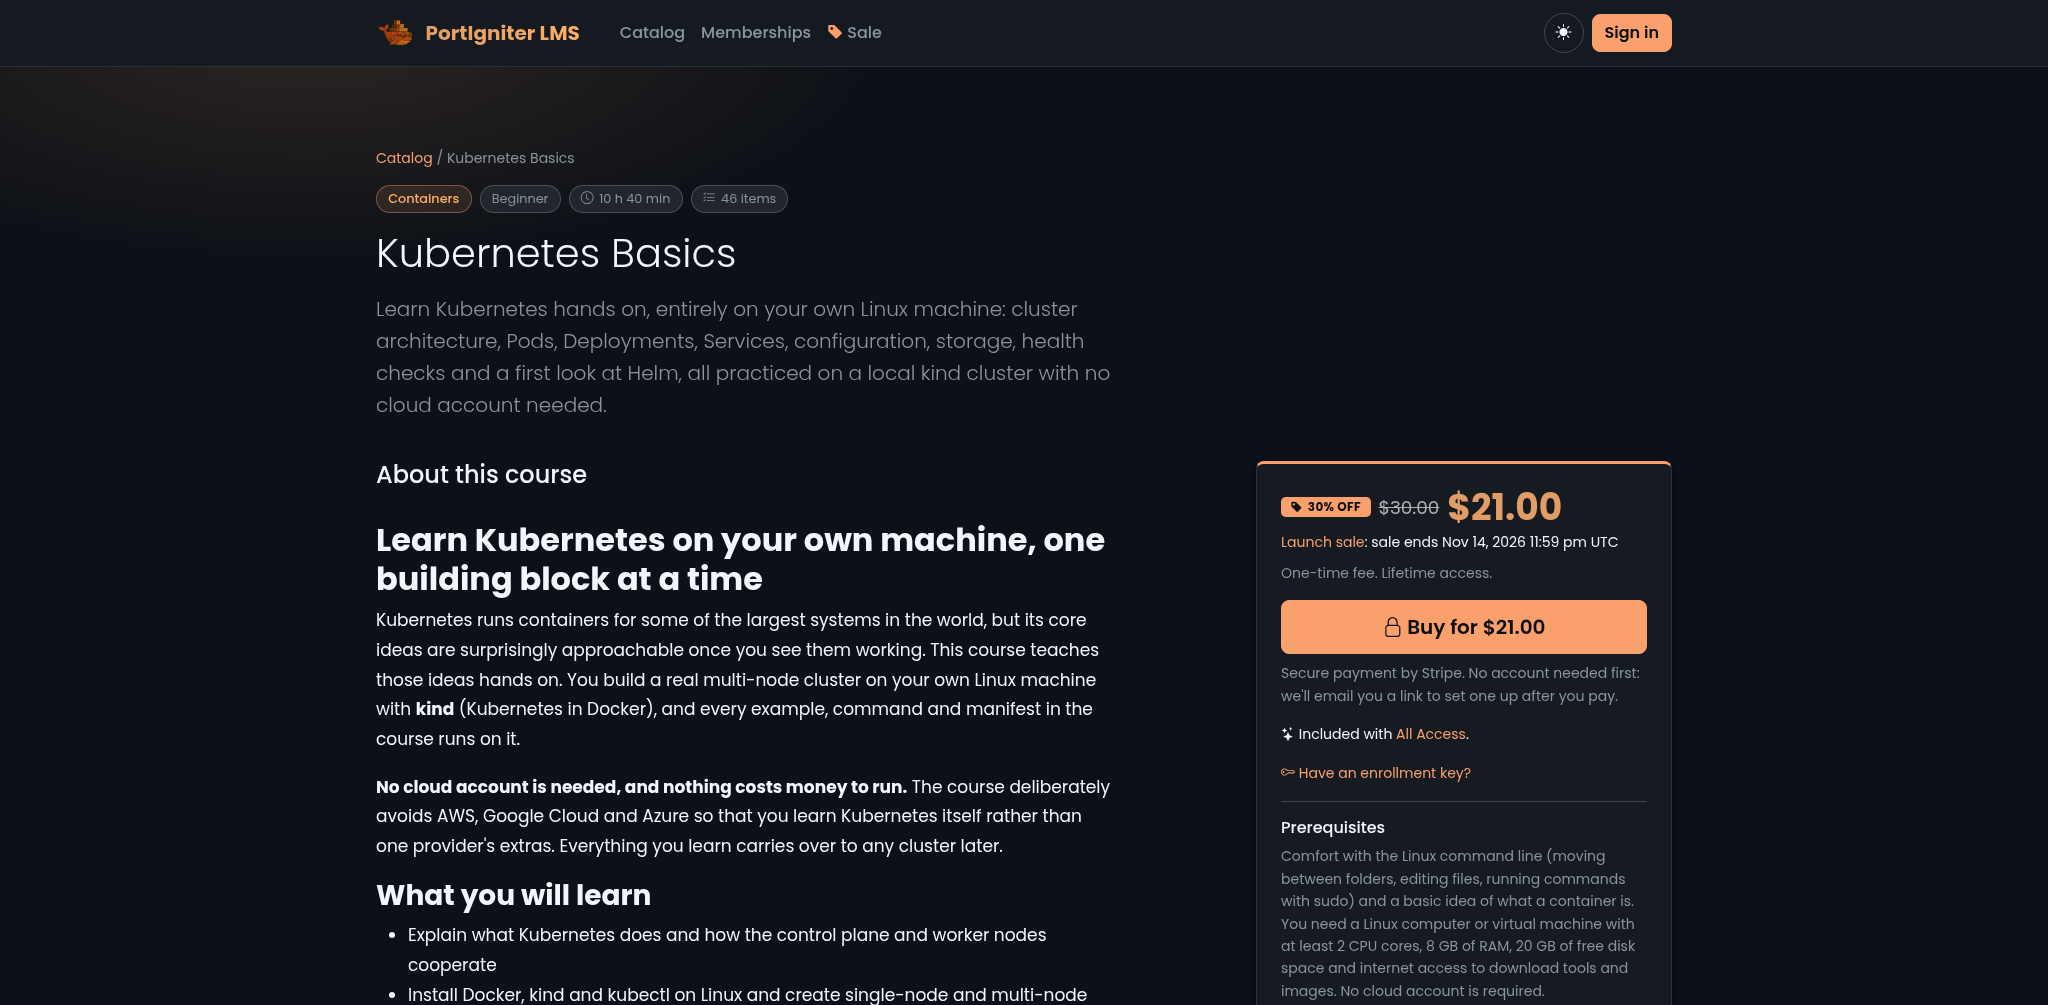
Buyers don’t need an account first. After paying, a new buyer receives an email with a link to set their password and activate their account. An existing learner is enrolled right away and emailed a link to the course. Purchases are always attached to the email address used at checkout.
A paid course set to By invitation only shows no price and can’t be bought. People can only join it with an invitation link or key, which grants complimentary access.
Refunds and disputes
Issue refunds from the Stripe Dashboard. PortIgniter LMS follows the money automatically:
- A full refund pauses the learner’s access to the course.
- A partial refund is recorded, and the learner keeps access.
- A dispute pauses access.
A learner whose access was paused this way sees the Buy button again, and a new payment restores access.
Taxes
PortIgniter LMS doesn’t calculate tax. Set your prices with tax included, or handle tax according to your own requirements.
Memberships
Memberships are monthly or yearly subscriptions that unlock a set of courses. Create them under Admin > Plans with New plan.
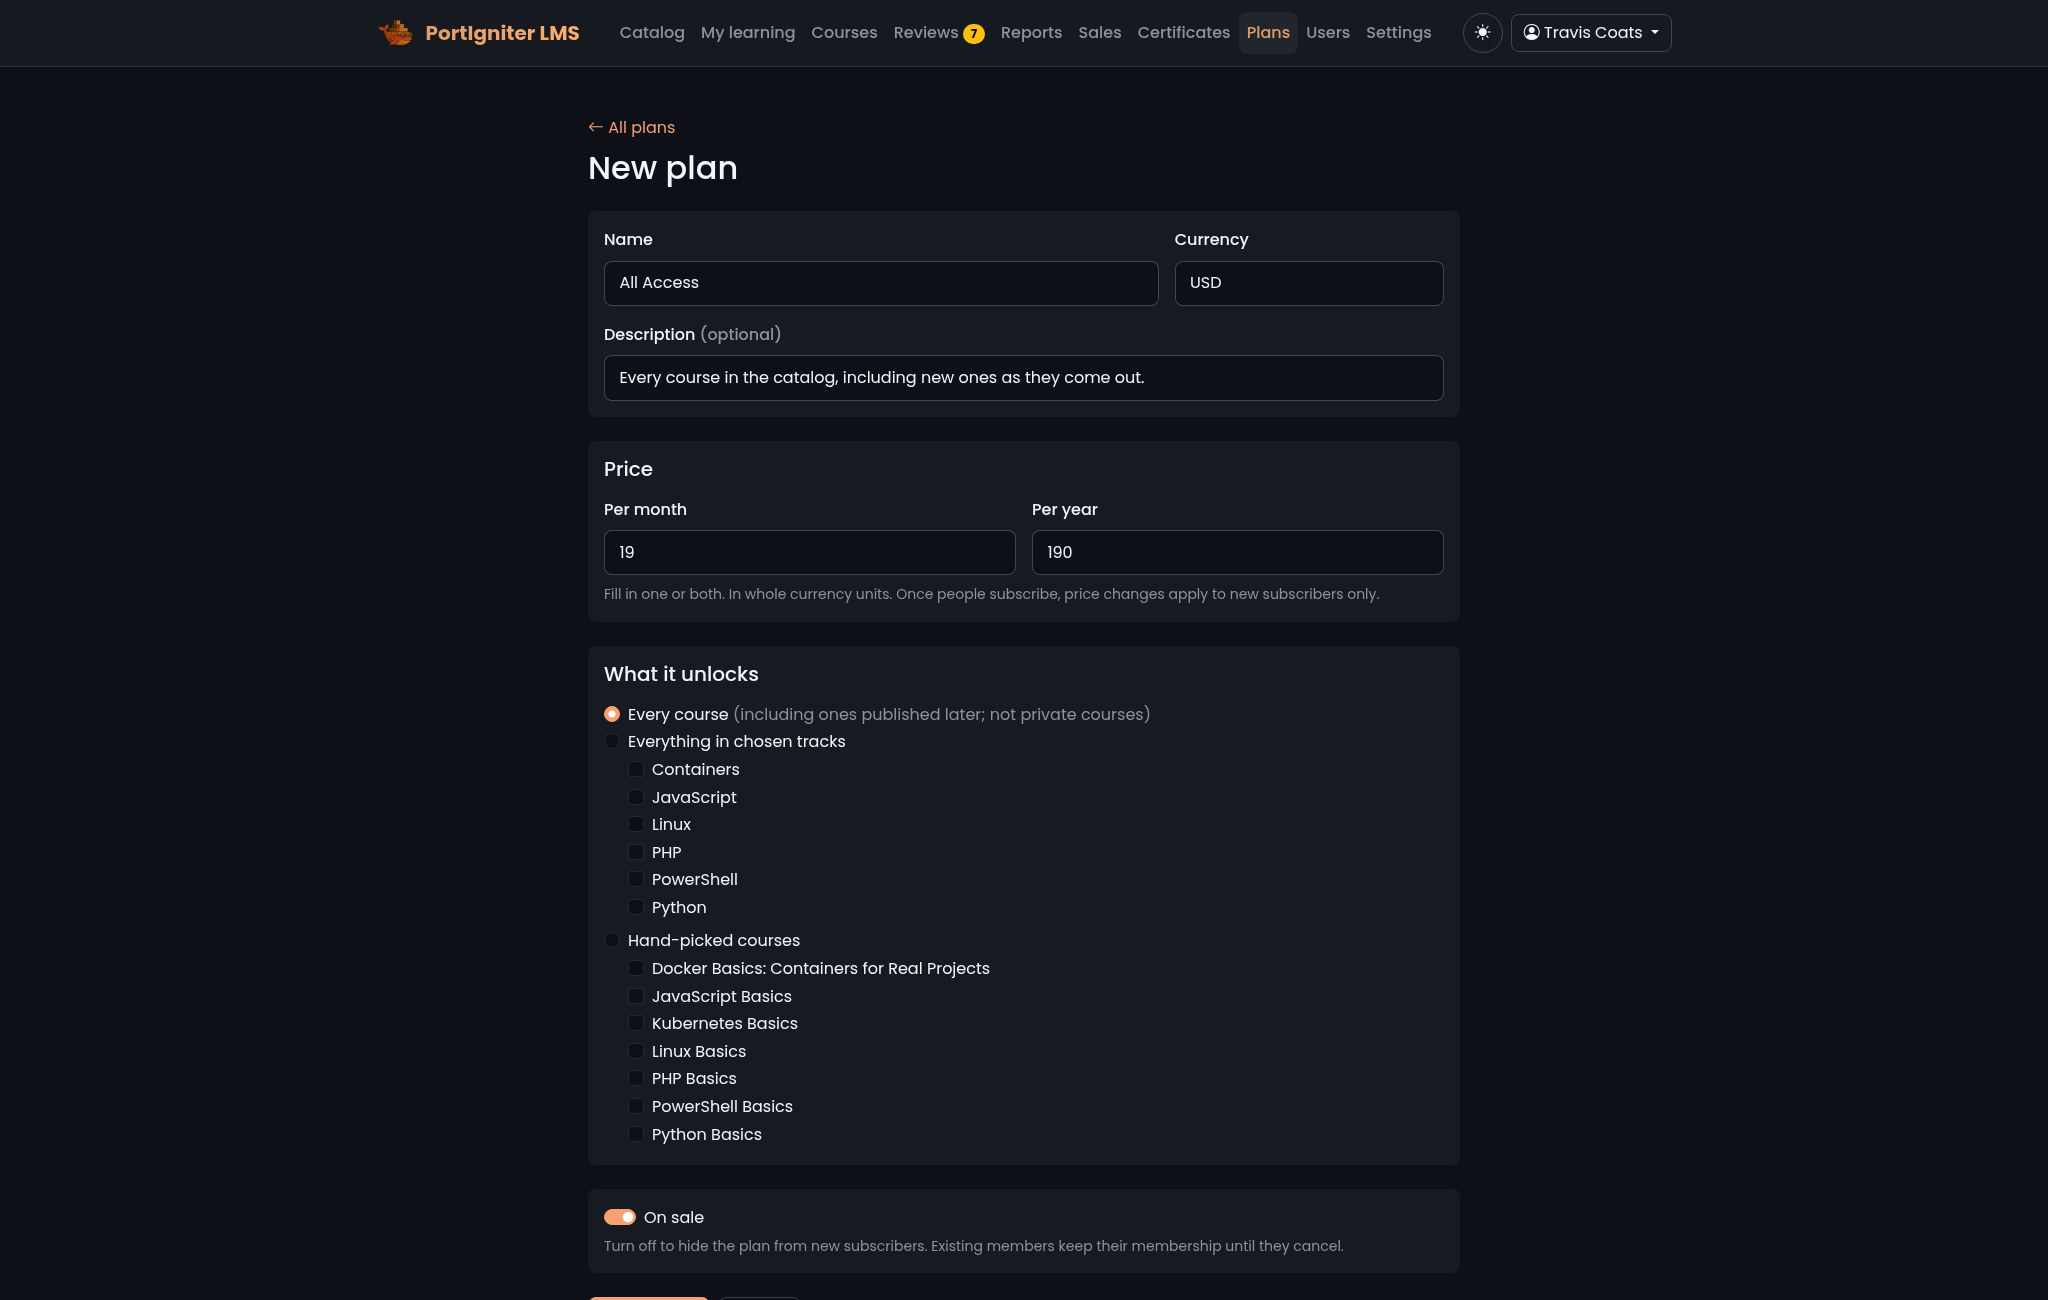
| Setting | What it does |
|---|---|
| Name / Description | Shown on the public Memberships page. |
| What it unlocks | Every course, Everything in chosen tracks, or Hand-picked courses. |
| Price | A monthly price, a yearly price, or both, in the currency you choose. |
| On sale | Whether new people can subscribe. |
Courses you publish later are added for members automatically when they match the plan. Plans that cover every course or chosen tracks skip private courses. Hand-picked plans can include them.
Once a plan is on sale, a Memberships link appears in the header, and visitors can subscribe from /plans without an account. New subscribers get the same activation email as buyers.
How access follows billing
- While a subscription is active, members can open every course the plan covers.
- If a renewal payment fails, members keep access while Stripe retries the card.
- When a subscription is canceled, access continues to the end of the paid period, then ends completely.
- A membership never shortens access a learner bought or was given separately.
Members manage their payment method, invoices, and cancellation through the Stripe Customer Portal, linked from Membership in their account menu.
Changing a plan
Plans are never deleted. Switch off On sale to stop new subscriptions. Price changes apply only to new subscribers, and existing members keep the price they signed up at. Changing what a plan unlocks applies to its existing members right away.
Promotion codes
Create coupons and promotion codes in the Stripe Dashboard under Product catalog > Coupons. When Let buyers enter a promotion code at checkout is on in Admin > Settings > Payments (the default), Stripe’s Checkout page shows a code box for both courses and memberships. 100%-off codes work too, and they’re recorded as $0 sales.
Sales
Run a time-limited sale under Admin > Promotions. A sale takes a percentage off every paid course, or off the courses you choose, between two dates.
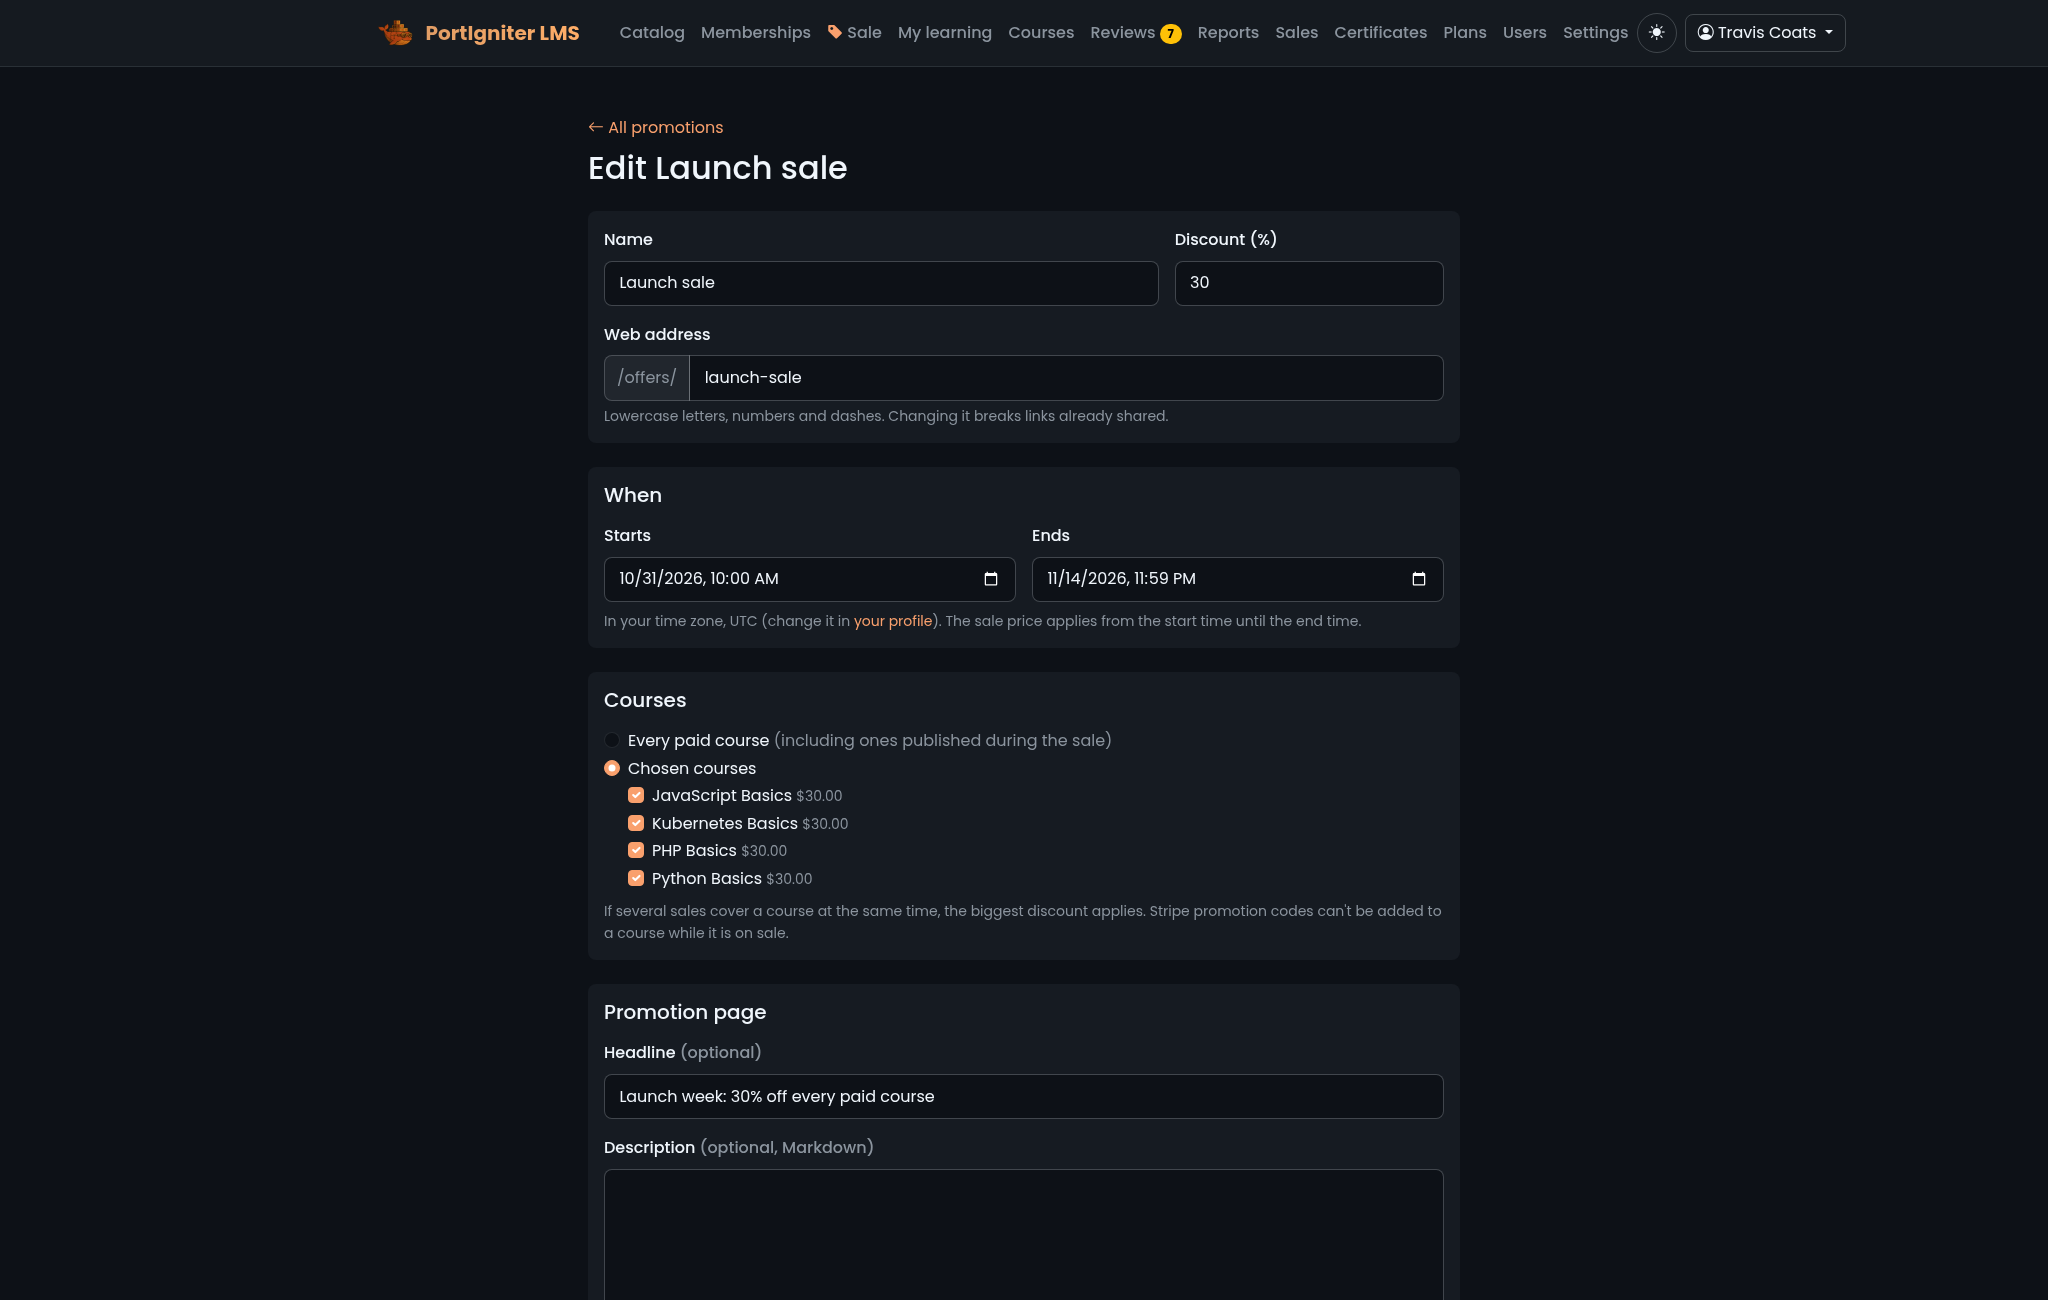
| Setting | What it does |
|---|---|
| Name | The sale’s name, shown on the course pages and in Sales. |
| Discount (%) | From 1 to 90 percent off. |
| Starts / Ends | In the time zone from your profile. The sale price applies from the start time until the end time. |
| Courses | Every paid course, including ones published during the sale, or Chosen courses. |
| Headline / Description | Shown on the sale’s own landing page. |
| Web address | The landing page address, /offers/<name>. Changing it breaks links already shared. |
| Switched on | Switch off to stop a sale early, or hold a scheduled one, without changing its dates. |
During a sale, the catalog, the course pages, and the landing page show the regular price struck through next to the sale price, and a Sale link appears in the header. Only courses that can actually be bought get a sale price.
Sales and promotion codes don’t stack: while a course is on sale, its Checkout page has no promotion-code box.
Admin > Sales
Admin > Sales shows how your courses and memberships are selling for any period you choose.
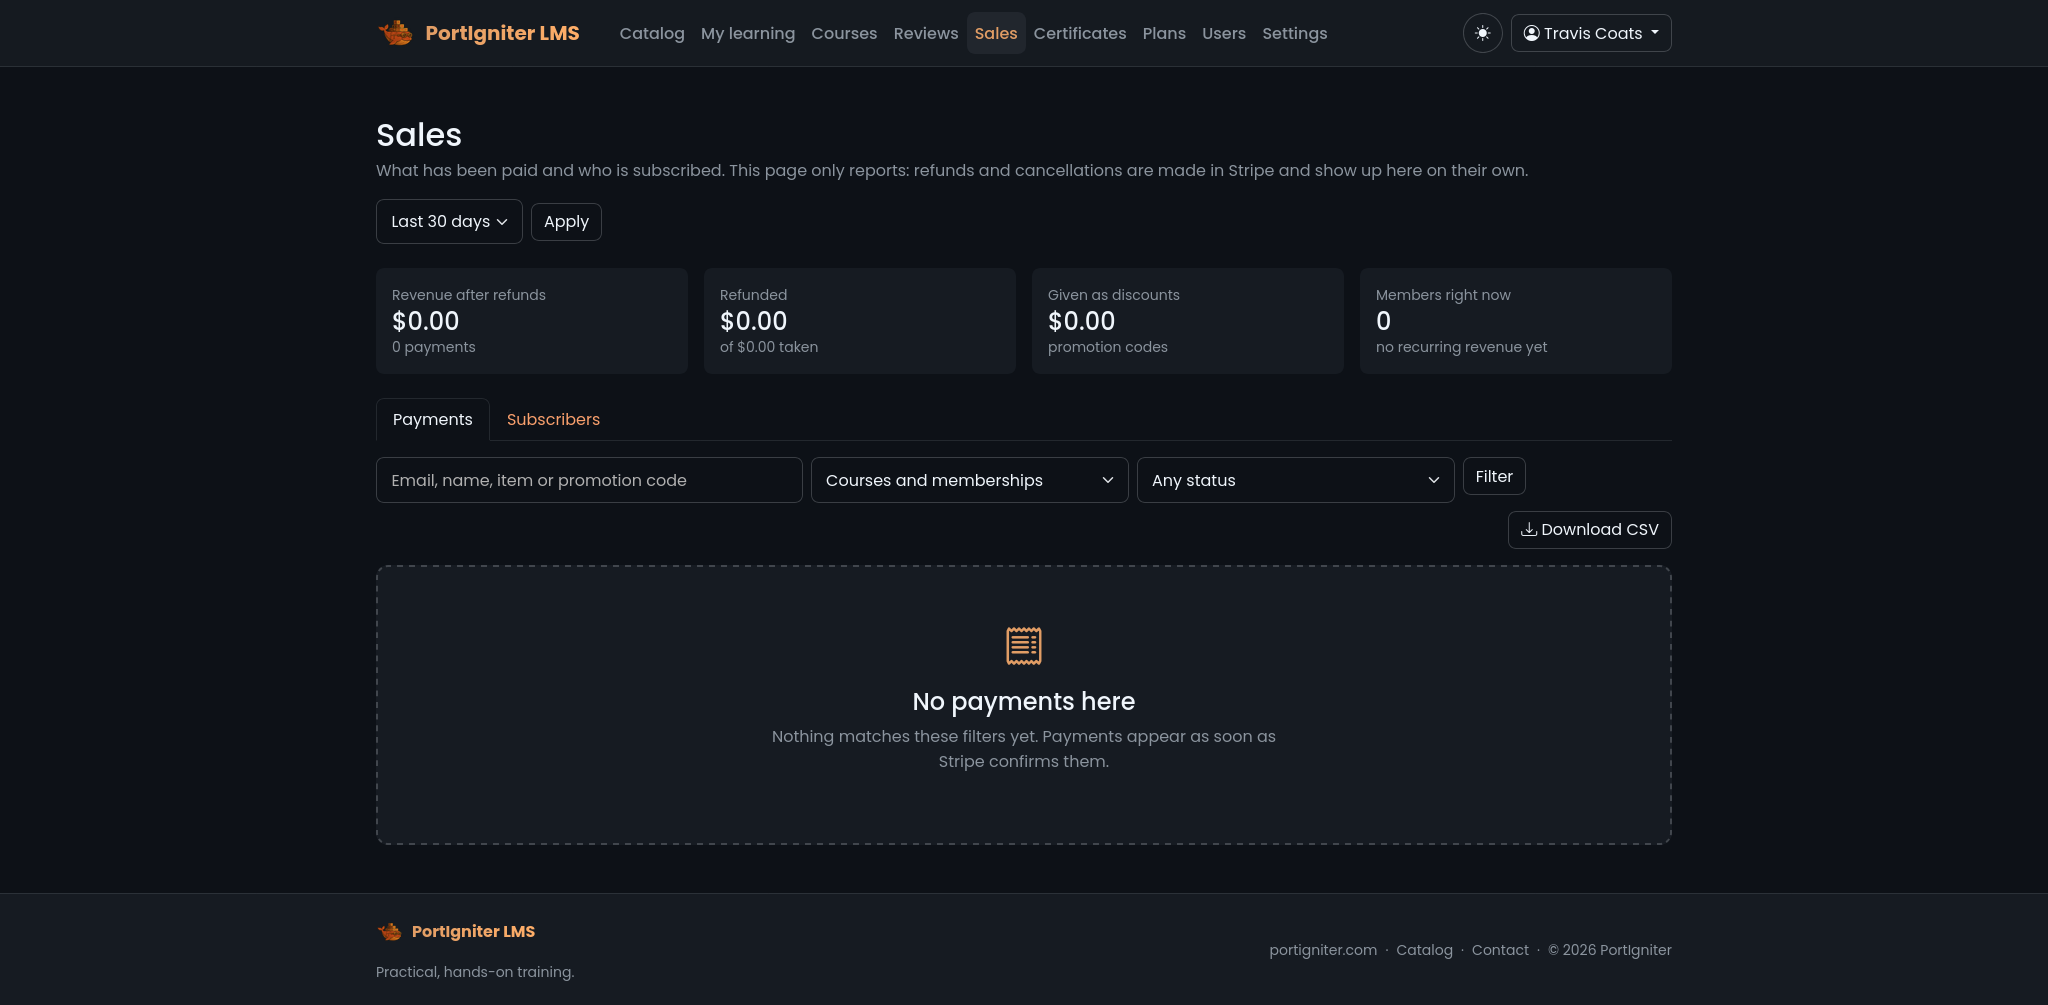
- Headline cards show revenue after refunds, refunds, discounts given, and members with an estimated monthly recurring revenue. Amounts in different currencies are never added together.
- Payments lists every course purchase and membership payment. Search and filter it, open any payment in the Stripe Dashboard, and click Download CSV to export what you see.
- Subscribers lists current, canceling, and past members, filterable by plan.
Times are shown in UTC. A person’s purchases and memberships also appear on their page under Admin > Users.